When you are creating a contribution or event page, you will have a 10-item, radio button-style fee table.
Quite often you will require additional fields for the radio button list, or would like to combine radio button options with checkbox items and a field where the donor/participant can enter their own amount.
To create this kind of complex structure, you will need to utilize price sets.
Price sets can be associated with either contributions or events. You can access the New Price Set and the Manage Price Sets menu items from either the Contributions menu or the Events menu. For our purposes, we will look at a Price Set for an event.
Creating a Price Set
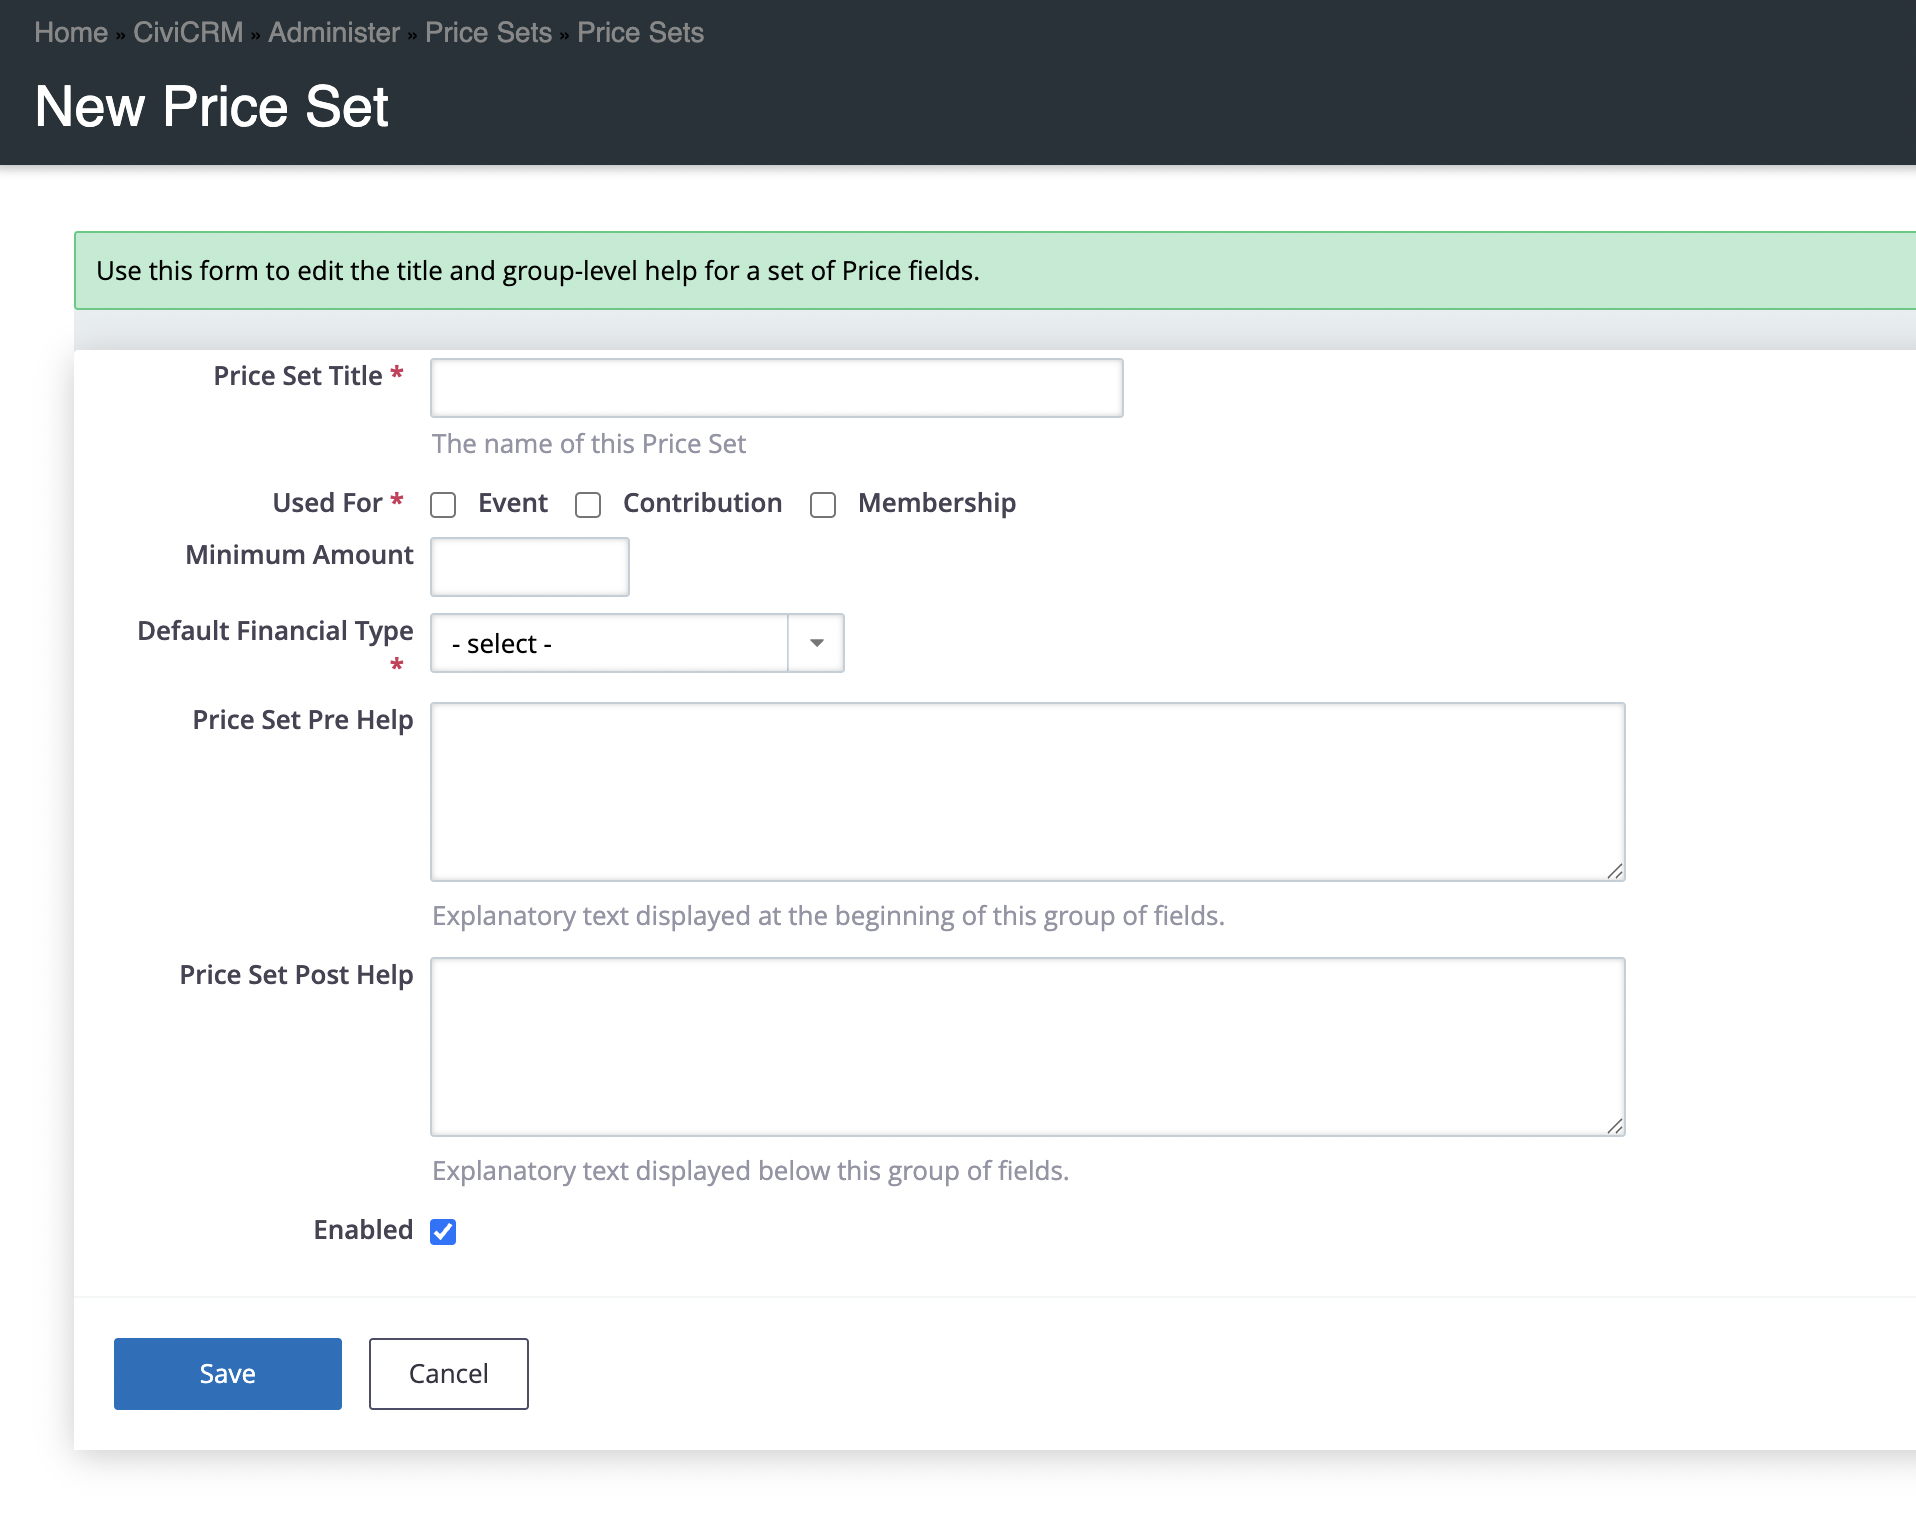
- Navigate Events > New Price Set.
- Enter a Set Name that coincides with the event so that it makes sense to you.
- Check the Event Used For checkbox (if you are setting up a price set for a contribution page, check Contribution).
- Enter any instructions you feel are necessary in the Pre-form and Post-form Help fields.
- Make sure that Is this Price Set active? is checked.
- Click the Save button.
Adding a Price Set Field

- Enter a Field Label.
- Select the appropriate Input Field Type from the drop-down.
NOTE: Depending on the Input Field Type you select, you will have additional options available for configuring the Price Set.
-
Enter a numeric value in the Participant Count field if you want the values of this field to count against the total number of participants for the event. THIS FIELD IS ONLY AVAILABLE FOR EVENT-BASED PRICE SETS.
- If you have selected Text/Numeric Quantity (which will allow users to enter an amount into the field), enter a per-unit price in the Price field (usually this will be 1 and you will want to uncheck the box that says Display Amount).
- If you have selected Select, Radio or Checkbox you will be able to add all your field options to the Price Fields Options list.
- Select Default if a given option should be the default amount.
- Enter a Label for the item.
- Enter the Amount.
- To add additional options up to 10, click the another choice link.
NOTE: If you need more than ten options, you can create an unlimited number of additional choices using the Edit Price Options link after saving this new field.
- Enter Field Help if necessary.
- You can also set the price field to be active and then expire on a set date. This will allow you to offer different pricing based on when the from is submitted. Use the Active On and Expire On fields to set this up.
- If this field is required, check the Required? checkbox.
- Click the Save and New button to save this field and create a new one, or the
Save button to finish.
You can now use your price set for an event (or contribution if you created a price set for a contribution page).
Enabling a Price Set
Price Sets are configured in both Contributions and Events through their respective Contribution Amounts and Fees forms. Assuming that you've set up your contribution page or event, enable price sets via:
For Contributions
- Navigate Contribute > Manage Contribution Pages.
- Click Configure for the contribution page.
- Click Contribution Amounts.
- Select the Price Set from the drop-down.
- Click the Save button.
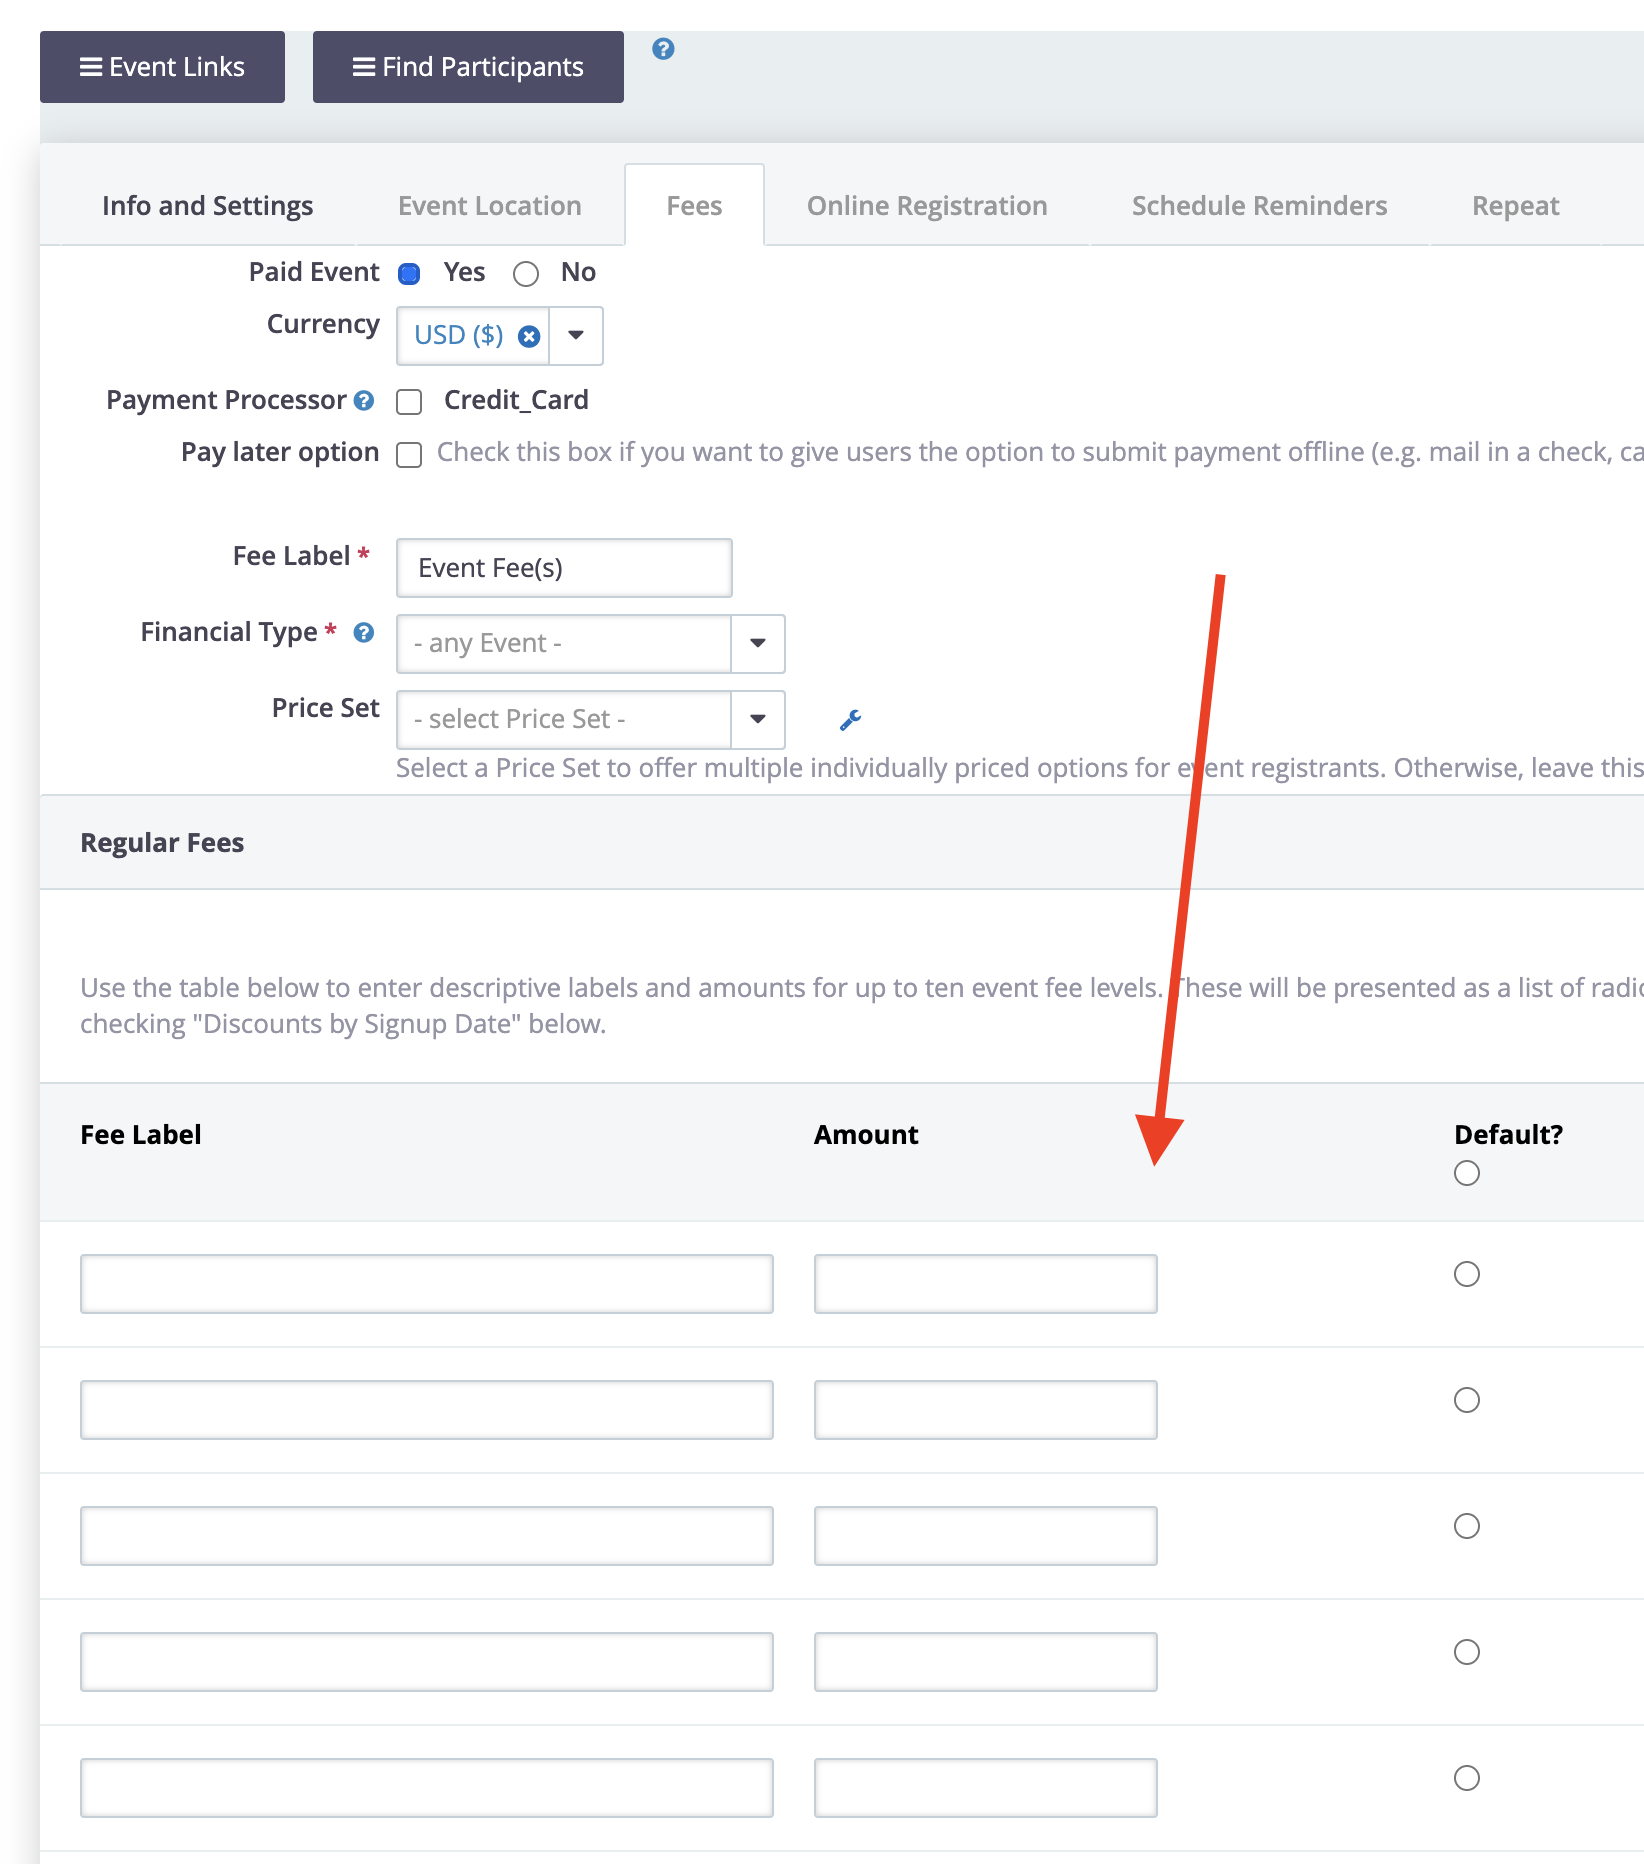
For Events
- Navigate Events > Manage Events.
- Click Configure for the event page.
- Click Fees.
- Select the Price Set from the drop-down.
- Click the Save button.