Stripe
Stripe is a very popular credit card processor mainly due to its capability of dealing with expired credit cards and also because there is no upfront cost to use Stripe. As of now, stripe integrates with CiviCRM for front end forms.
Integrating Stripe
In Chabad Suite
- Navigate to Administer > System Settings > Payment Processors and click "Add Payment Processor"
- From the "Payment Processor Type" drop-down menu, select "Stripe"
- In the Name field, enter the word "Credit Card"
- Select a financial account (if you are not using Chabad Suite in your Bookkeeping workflow, any account will work)
- Complete the requested fields and enter your API Keys from your Stripe.com account
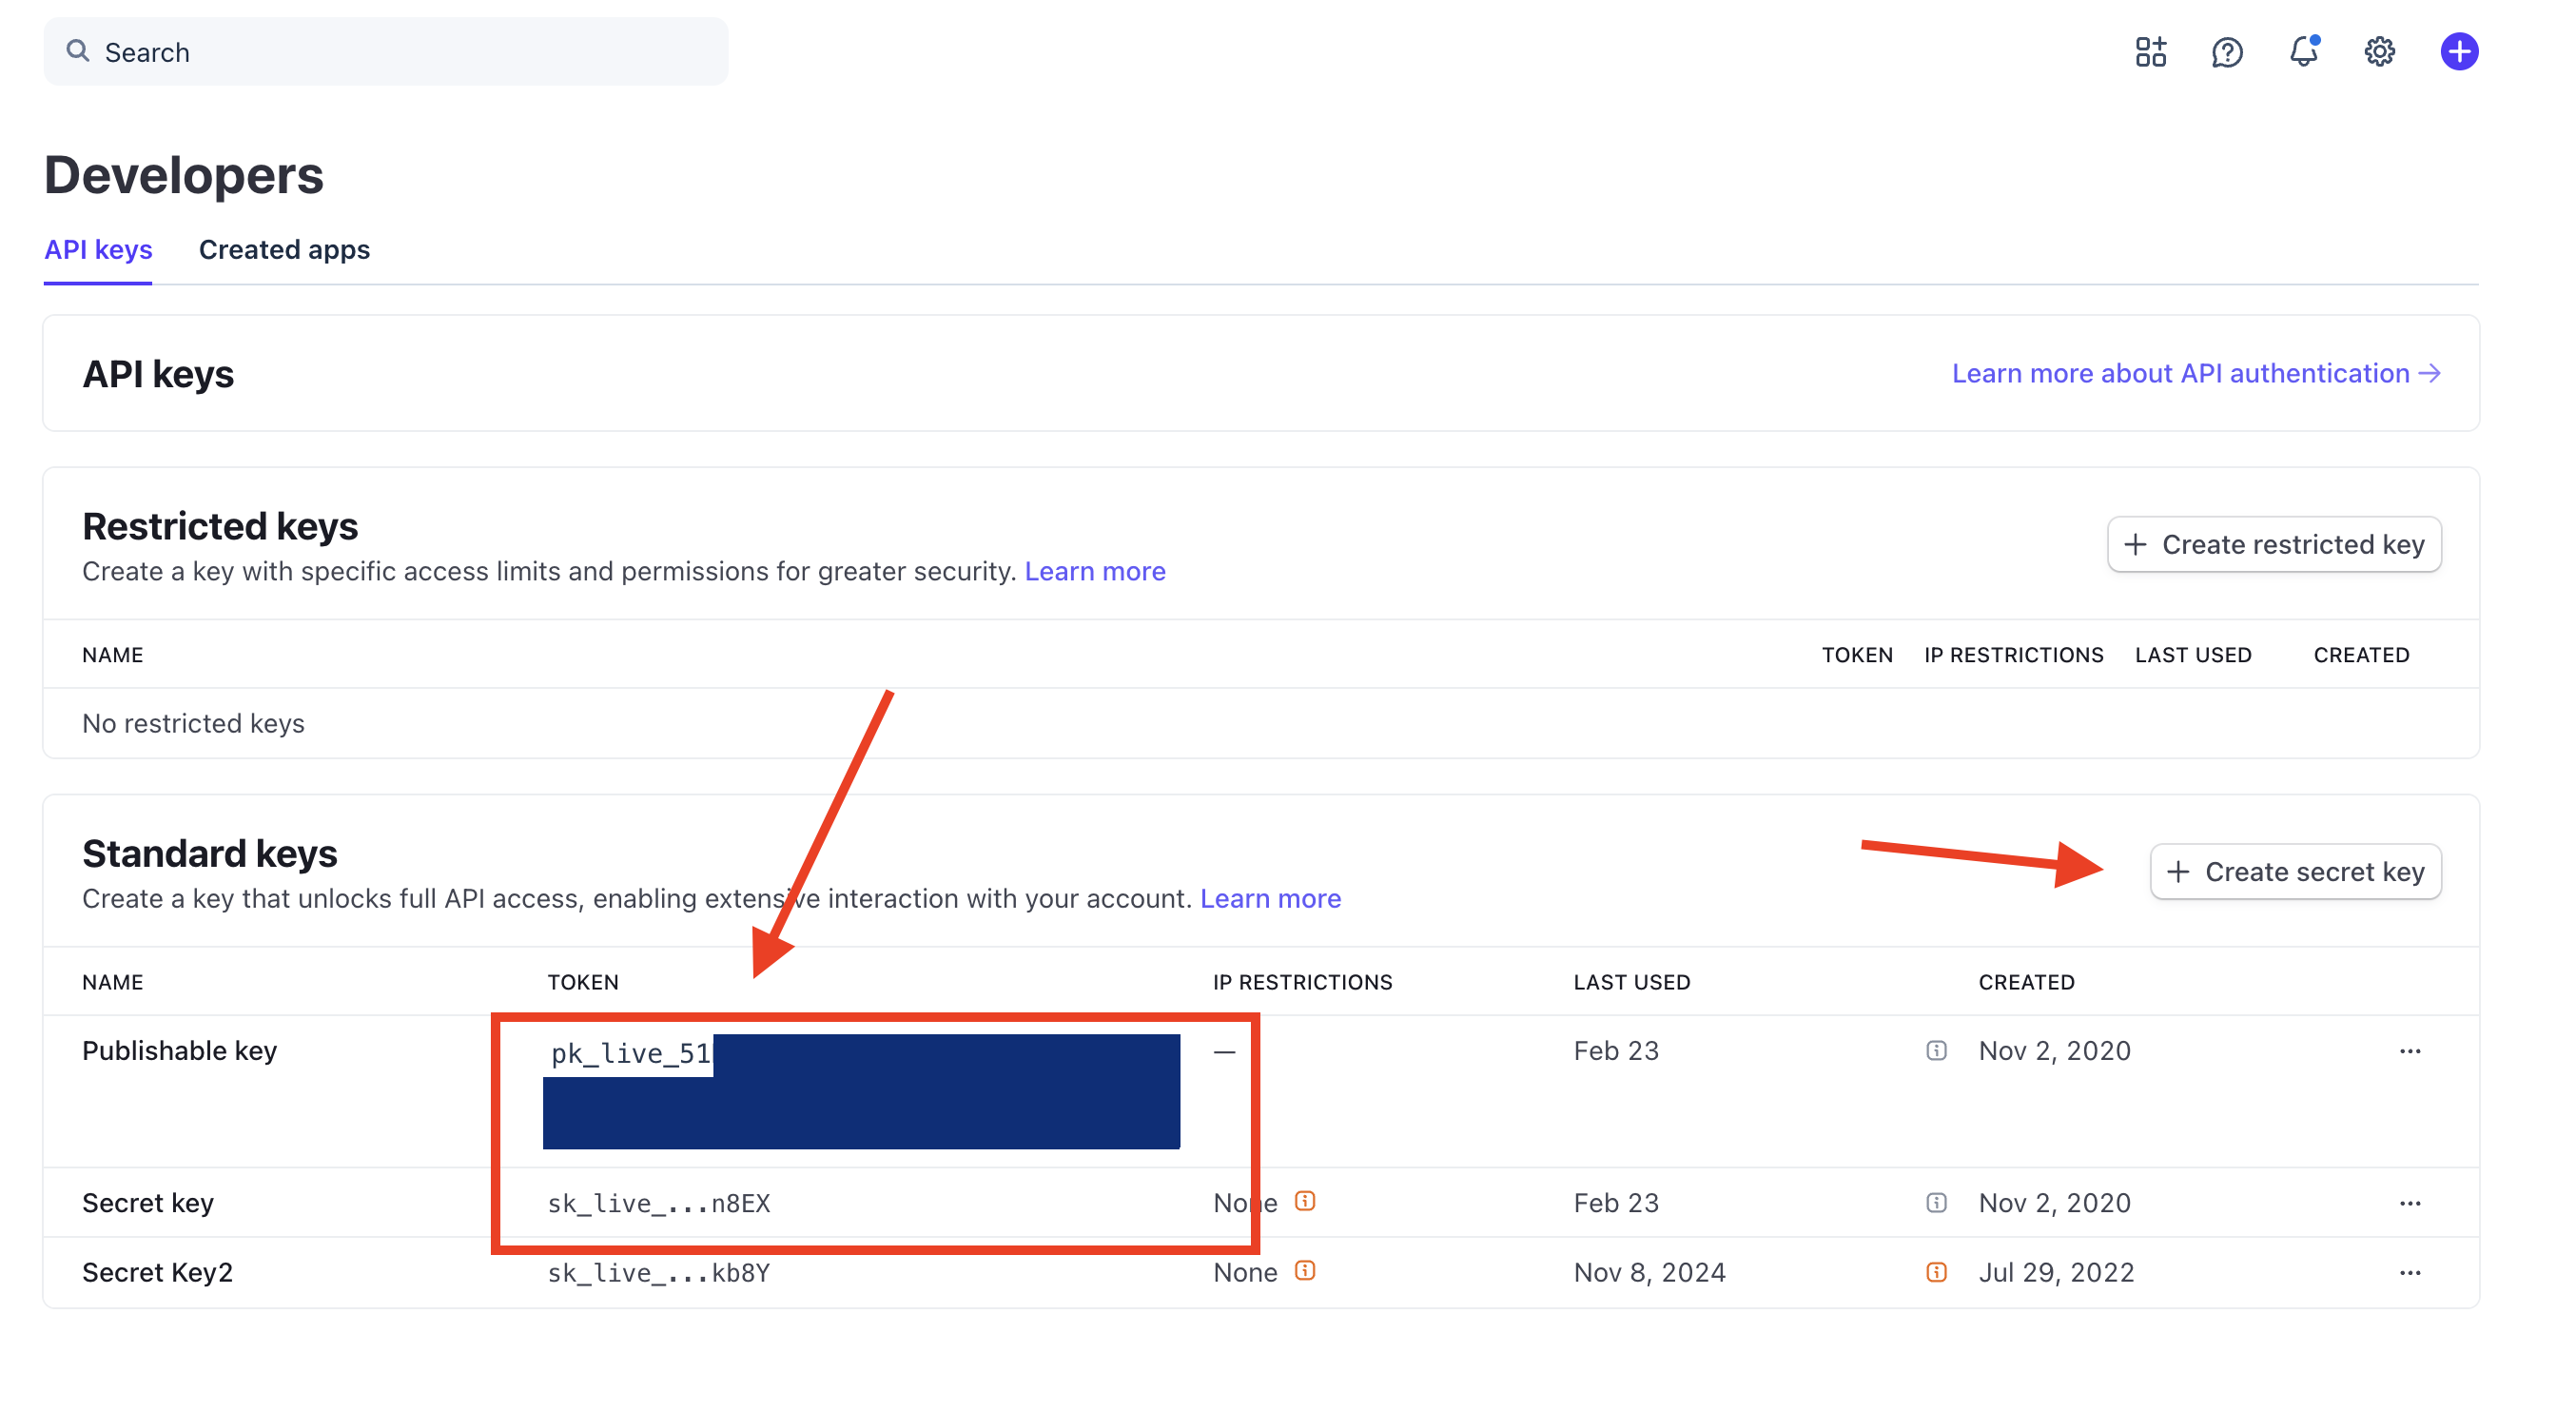
- Log in to your Stripe account, and search for API keys in the top search bar. Copy the Publishable key and the Secret key and paste them in the “live” section on the CRM. (Note that some accounts will only show you the secret key for one time. Make sure to paste and save it somewhere). If you cannot view the existing secret key, click on the Create secret key button.
-
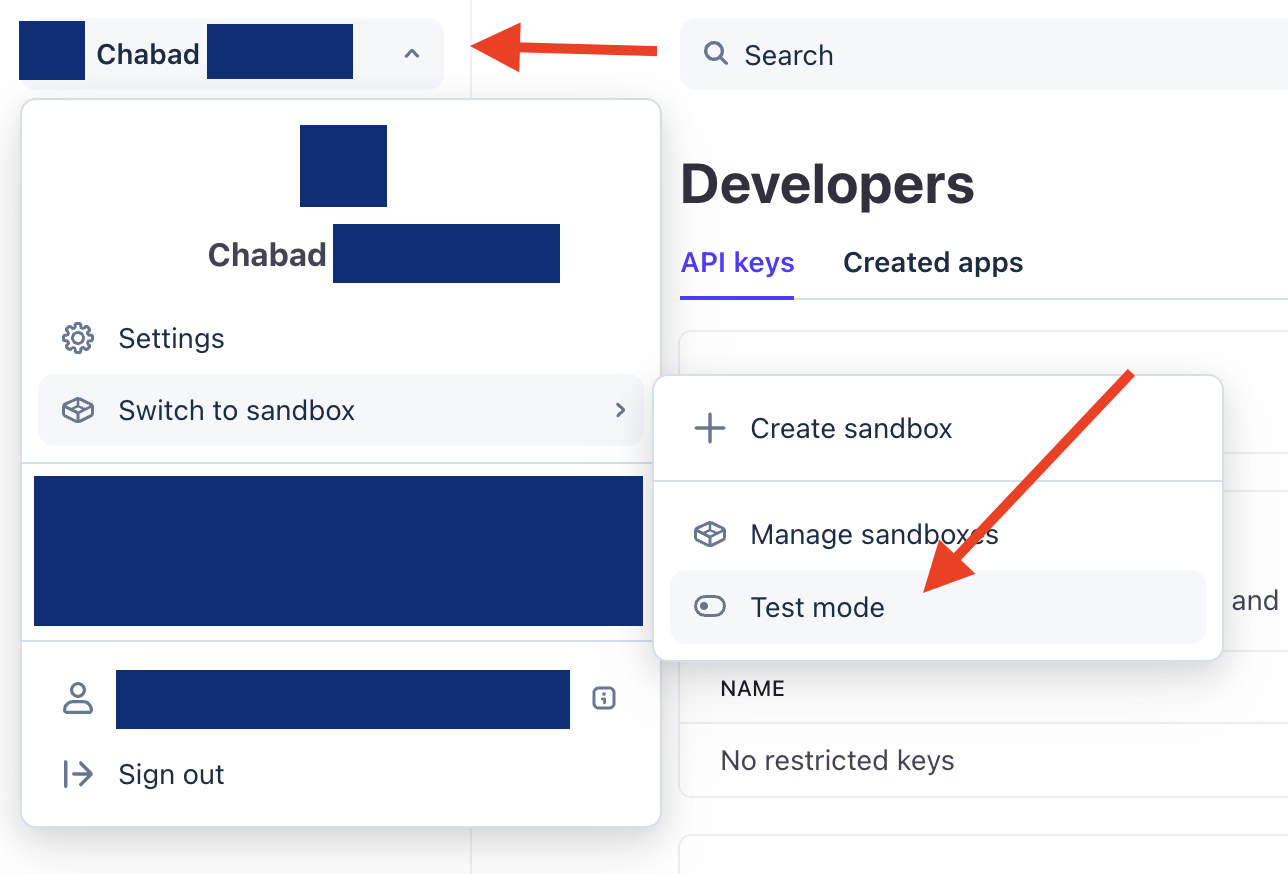
Then click on your account name on the top left corner > Switch to sandbox > Test mode, and a different Publishable key and Secret key will be shown (both will start with pk_test and sk_test). Copy and paste them in the “test” section on the CRM.
-
Save.
Disabling the “Link” Payment Option
We’ve seen occasional issues with forms not submitting properly when Stripe’s Link payment feature was enabled. To avoid potential problems, we recommend turning it off.
To disable Link:
- Log in to your Stripe Dashboard.
- Go to Settings → Payments → Payment methods.
- Click the "Default" line.
- Search for "Link" in the list.
- Click to disable it.
This will remove the “Pay with Link” option from your forms and help ensure smoother submissions.